Alarms are generated when a device or connection is not working properly. Trouble tickets are generated in response to alarms. The alarm state continues until the cause of the alarm is no longer detected.
You can view alarms in Active Map, Network Details, or via a Search. Again, only active alarms are shown. All alarm history is captured in the tickets opened in response to the alarms.
To view alarms in Active Map:
Select Home > My Settings from the menu. In the Active Map Settings section, check the Alarms option.
Click Save Settings.
Select the Active Map tab. Any red connection or site indicates an active alarm. To access details on the alarm, click the red area.
To view alarms in Network Details:
Select the Network Details tab. If there are active alarms for the element or location currently selected in the Network Tree, you will see a checkmark on the Alarms tab.
If you see a checkmark on the Alarms tab, select Alarms. A list of all active alarms for the selected element or location appears showing the following:
Severity
Device name
Type
Date and time alarm generated
Description
To view alarms using Search:
Select the Search tab. In the left navigational area, click the Search Alarms category.
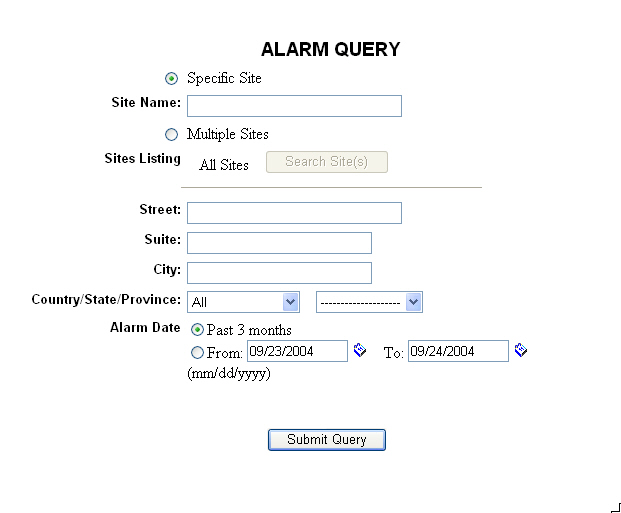
The Alarm Query window appears. Select either Specific site or Multiple sites.
Example:
To search a single site:
Click the Specific Site option.
If you know the specific site name, enter it, or
If you do not know the exact site name, enter information into one, some, or all the address fields, and select appropriate information from the Country/State/Province drop-down menu.
Using either of the following two options, set the alarm date.
Click the option for the past three months, or
Click the From option. By clicking the drop-down calendars and selecting a date or by typing over the text in the date fields, enter the date range for the report.
Click Submit Query.
To search multiple sites:
Click the Multiple Sites option.
NOTE: When selecting multiple sites, you have two options: all sites or selected sites.
If you want to search all sites, click Submit Query. A listing of all sites appears. Click any site to see the site information and inventory details for that site.
If you want to search selected sites, click Search Site(s). The Available Customer Sites window appears.
Select the location options, and then click Find Customer Sites.
From this list of Available Customer Sites, highlight the appropriate site(s).
Click Select. The screen repopulates with your selected site(s) in the Selected Sites list.
Click Selected Sites. This returns you to the Alarm Query form with "Filtered Sites" showing next to the Search Site(s) button. The search is now based on your selected sites.
Using either of the following two options, set the alarm date.
Click the option for the past three months, or
Click the From option. By clicking the drop-down calendars and selecting a date or by typing over the text in the date fields, enter the date range for the report.
Click Submit Query.
Related topics:
Tracking an Open Service Request (Work Ticket)
Viewing a Closed Service Request (Work Ticket)